Sunday, April 26, 2015

DIY Crepes


The Best Crepe Recipe Outside of France


Towards the beggining of the year I visited Germany, and everywhere in Germany stalls sold these delicious crepes. When I came back home, I had to figure out how to make them, so I tried multiple recipes online but ended up using parts from each one to come up with the best recipe. These crepes are so easy to make and taste just like the ones off the streets in Germany and France.


Ingredients:
  • 1 1/2 cups of flour
  • 2 teaspoons of salt
  • 2 cups of milk
  • 4 eggs
  • 4 tablespoons of sugar
  • 2 tablespoons of melted butter
  • 1 teaspoon of vanilla extract


Directions:

1) Pour flour and salt into a large mixing bowl


2) Next, whisk in the milk one cup at a time. Then whisk the eggs in one by one.


3) Then mix in the sugar, melted butter, and vanilla.


4) Cover the mix and let it rest in the refrigerator for at least 30 minutes, but up to 10 hours.


5) Next, heat up a 8-10 inch nonstick skillet or crepe pan anywhere from medium high to medium low.

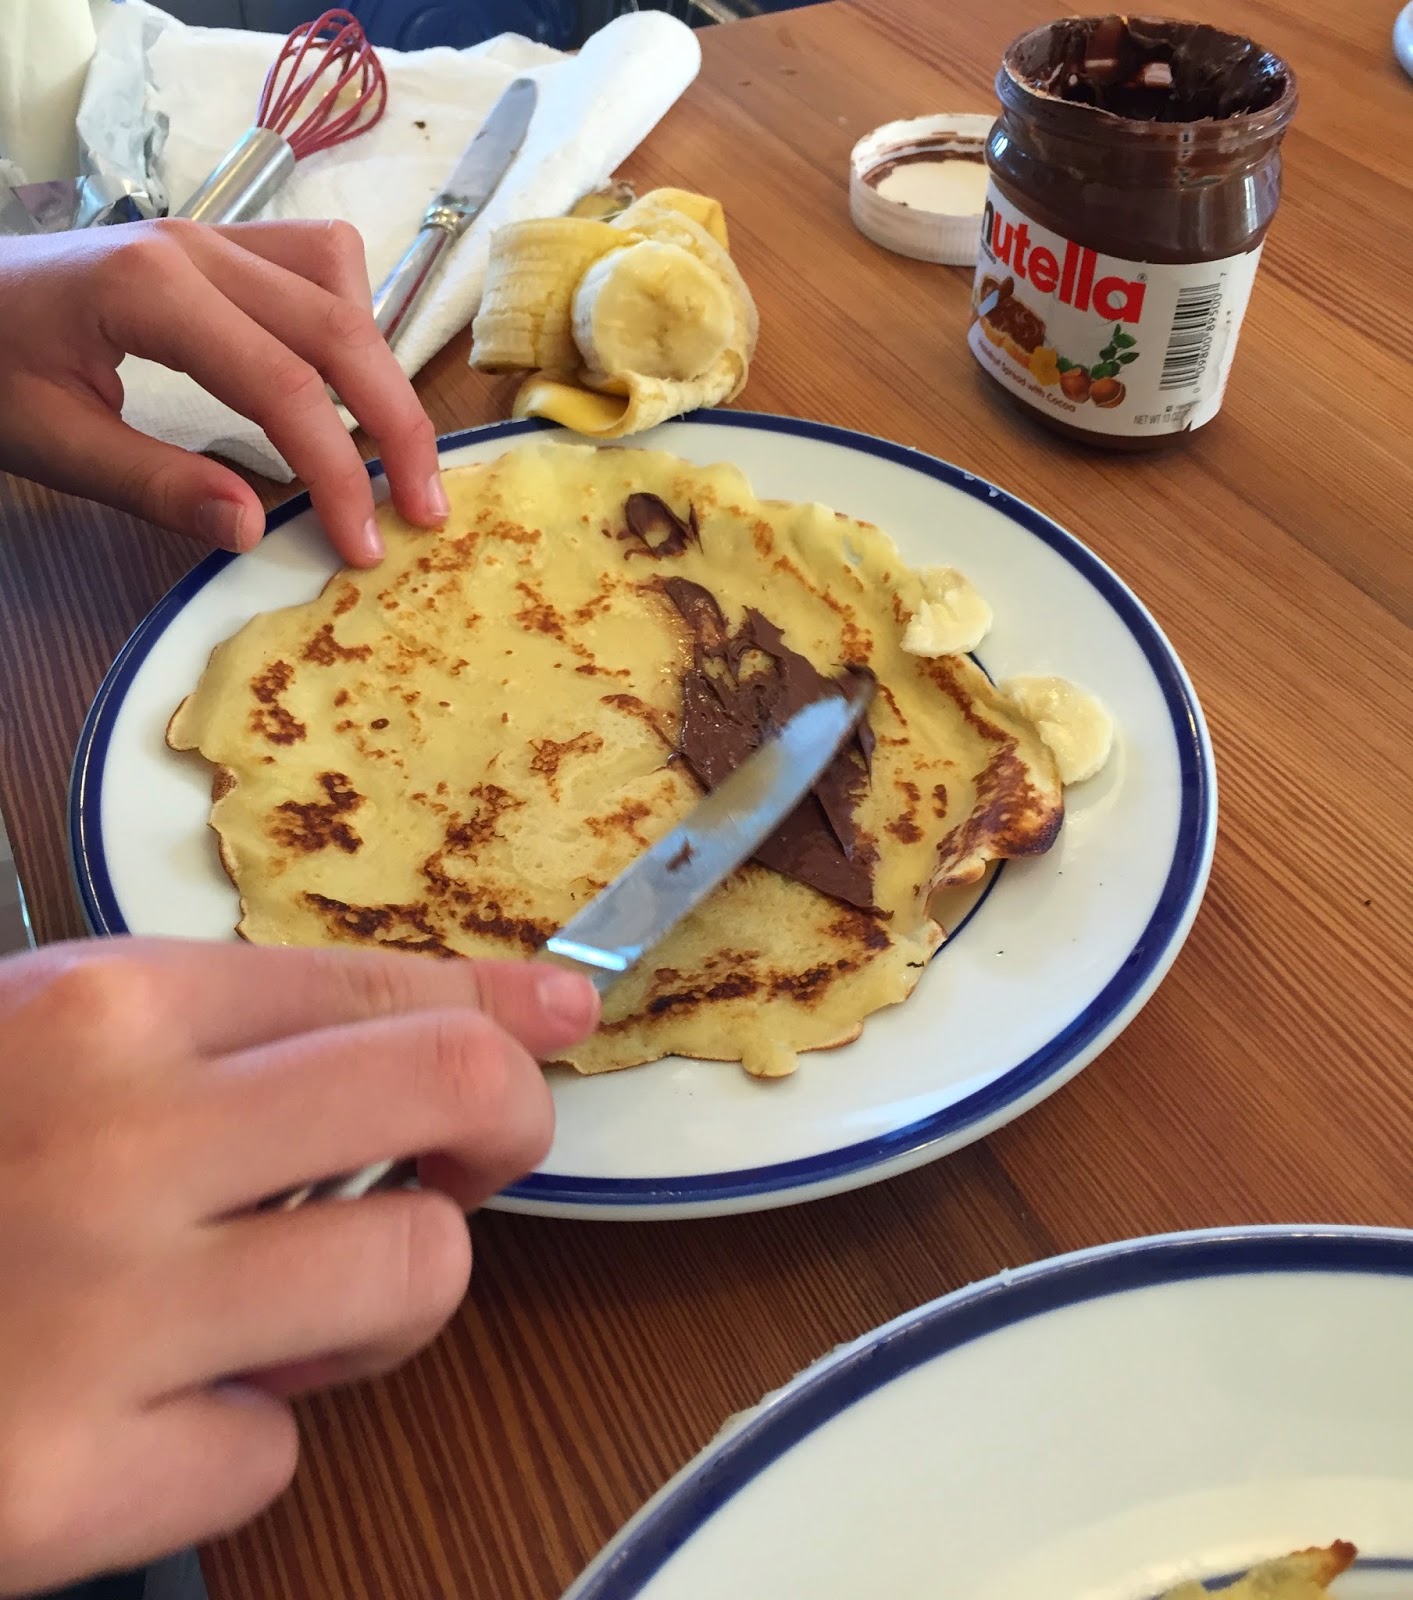
6) Add 1/3 cup of batter onto the skillet and move the pan in a circular motion to spread the mixture. Cook until the batter becomes less liquid, light brown, and able to carefully flip over. Flip the crepe to cook the other side and then use a spatula to carry the crepe onto a plate.


There are many ways to serve crepes. A few options are with Nutella, jams, honey, lemon and sugar, peanut butter, and sliced bannanas.


How to: Waterfall Braid


How to: Waterfall Braid


        Hello! This blog post will show how to do a fish tail braid. This braid may seem a little challenging at first, but after some practice the braid is a piece of cake.


1) The first step is to brush your hair out. If you have knots in your hair, it will be extremely challenging to do the waterfall braid.

2) This step is optional, but I find that it is easier to clip one half of your hair to the side because this braid is only done on one side.


3) Next, select three strands of hair from one side of the head to start the braid.


4) Do a normal braid once for the strands, going under and over with each piece of hair.


5) Then, using the strand of the braid closest to the top of the head pick up another small strand of hair and add it to the other strand.


6) Continue doing basic braid, but when you get down to the bottom of the braid drop that strand of hair and pick up another one to continue with the braid. This step creates the waterfall effect of the braid.


7) Lastly, continue on with the braid following the same steps until finished. At the end of the braid, do a normal braid to finish up, and then add a clip to finish the braid.


Click on the link here to see a video on how to do the waterfall braid if you are still having trouble.

Sunday, April 12, 2015

Homemade Dog Treats

   
        Every dog loves treats, so why not learn how to make some for your dog. My dog is named Hashbrown, and does not like many treats, so I spent a lot of time testing and figuring out the best treats for her and I came up with this recipe. One of the coolest things about these delicious treats is that they can either be baked or frozen. These treats take about 10 minutes to make and either 10-15 minutes to bake or an hour to freeze.


Ingredients:

  • 3/4 cup of peanut butter (make sure only to use peanut butter because other nut butters can be poisonous to dogs)
  • 1/4 tsp cinnamon
  • 1/4 cup of water
  • 1 cup of oats
You will also need a cooking tray, aluminum foil or parchment paper, a medium bowl, and a mixing spoon.


1. Start off by putting parchment paper or aluminum foil on a cookie sheet and set it aside.


2. Put the peanut butter, cinnamon, and water in a bowl.


 3. Mix them together until they reach the consistency of applesauce.


4. Next, pour in the cup of oats into the bowl and thoroughly stir together with the other ingredients.


5. Shape the mixture into small balls or biscuits and place them on the cookie sheet.


6. All that's left is to choose if you want your dog treats baked or frozen. If you chose frozen, put the tray into the freezer for 1-3 hours. After that, refrigerate the treats until further use. If you chose baked, preheat the oven to 350 degrees and once it is heated bake the dog treats for 10-15 minutes depending on the size. 


7. Feed these delicious treats to your dog when they are finished! My dog loved them!


Thanks for reading! Don't forget to subscribe to Soph Crafty.


DIY Knock-Off Bangle Bracelelts


     Hello! Today's post is showing how to make DIY bangle bracelets. Bracelets just like these sell at stores for $30 dollars, but I was able to make 20 bracelets for only $20. And, these bracelets are siper easy, cute, and stylish. To find out how to make them use the link to the YouTube Video here! Hope you enjoy!


Sunday, March 29, 2015

DIY Sharpie Shoes


Hey everyone! This blog post will be showing how to decorate a pair of white shoes just by using sharpies. When I imagined the final product of these shoes I never would of guessed they would be so  cute and easy to make!


To make the shoes you need: white shoes (I got mine at Target for $17), thick sharpies, sharpie fabric pens, or thin sharpies, pencil may be helpful.


I chose to use a mint-green colored sharpie for the polka dots on the shoe, a pink sharpie to outline the shoe and to color the shoelaces, and a light blue sharpie for the monogram on the back. You can choose to use any types of sharpies and any colors you like.

The first step is take your selected sharpie and use it to outline the soles of the shoe. Start in the center of the rubber part of the shoe and slowly dragged my sharpie across the whole shoe. A tip for this part is to never stop moving the sharpie because if you do it causes uneven lines. 


Next, color the plastic parts of the shoelaces the same color as you outlined the sole of the shoe. 


After that, choose a spot to start on the shoe and use a different color to make 1/2 an inch sized polka-dots. Then, keep drawing polka-dots all over the shoe using a constant space between each polka-dot. Just remember that these polka dots are hand-drawn, so they won't be perfect. 


Once, all of the polka-dots have been drawn, take the same color that outlined the shoe (pink in this tutorial) and color in the raised outlined parts of the shoe as shown in the picture below.


Lastly, using the third colored sharpie chosen, write your initials on the back of the shoe. This is one of my favorite touches because it gives the shoes a personal touch.


Now,  all that's left to do is the other shoe! 


Thanks for reading! The next post will be up soon! If you enjoyed reading this, please subscribe to Soph Crafty to get weekly emails about the blog. You will also be notified whenever a post comes up. 

Monday, March 9, 2015

How to: FishTail Braid


Hi! Today I will be showing how to do a simple Fishtail braid. This braid may be seem tricky at first, but once it is learned it is very simple. This braid can be worn to school as a simple hairstyle or can be worn for a fancy night out. Follow the steps below to see how to do this braid. 


1. Always start out by brushing out your hair. If there is knots in your hair, it will be extremely difficult to do the braid. 


2. Split your hair into two equal parts. 


3. Take a small piece of hair close to your face from the right side. 


4. Bring that strand of hair over to the inner part of the left side.


5. Group that strand of hair into the left side and hold the hairs together.

6. While keeping the left and right group of hair apart, choose the strand of hair closest to the face on the left side. 


7. Bring that piece of hair over to the group of hair on the right side.


8. Place that piece of hair into the group of hair on the right side.

9. Repeat this process again by picking a strand of hair from the right side and bringing it to the left and picking a strand of hair from the left side and bringing it to the right. Continue this process until the braid is finished.


If you still have questions or trouble on this Fishtail braid, just comment below. Thanks for reading!

Hi everyone! My name is Sophie and I am an eighth-grader who loves crafting! I am making this blog for a school project, but I hope to continue it after the school year. I will be posting crafting tips, craft ideas, and anything else DIY (do it yourself). The first post will be coming up soon. Thanks!